It was fun and interesting. I got to know more about how things actually work. Compared to chemistry, it was a lot less complicated. I like both Physics and Chemistry. Our physics teacher is great at teaching. I got to love science more and I found it more interesting after actually learning how things really work.
|
This is my mind map for Chapter 7 with the topic: 'Kinetic Model of Matter' 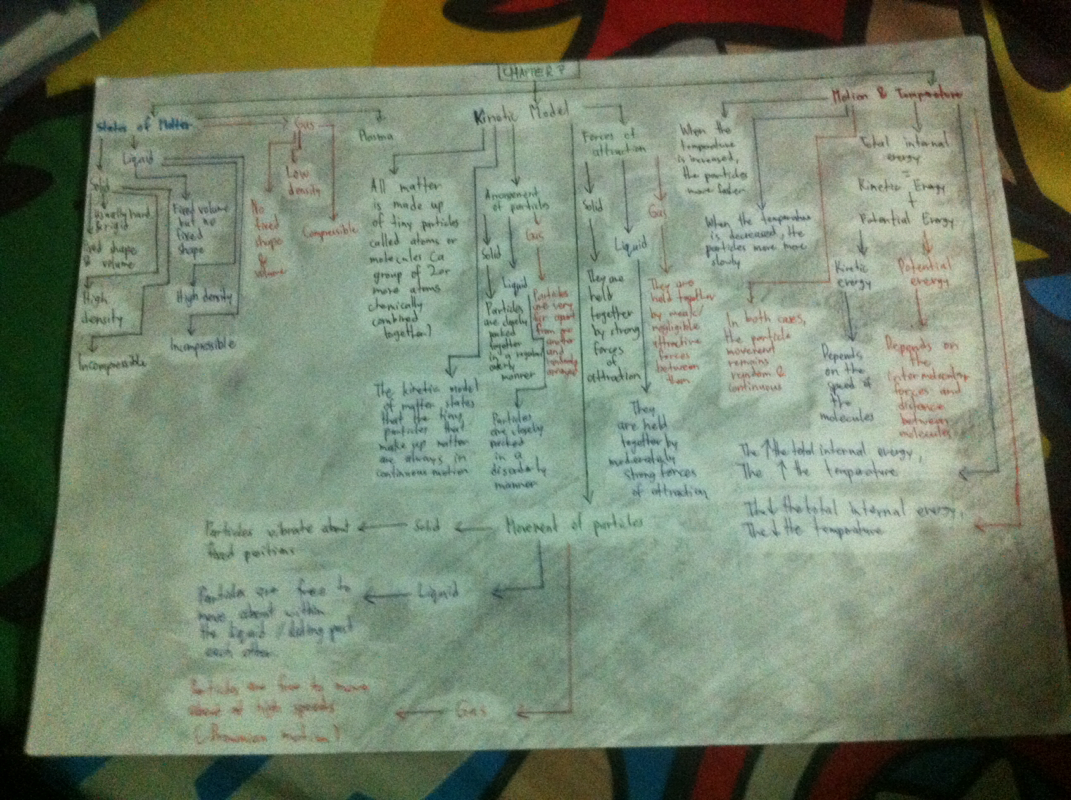 Paper 1 What I don't understand about my mistakes: Section A Q18) I thought energy is transfered through vibrations and not so much on density Section B Q6b) Is there a difference between good conductors of heat and good absorbers of radiation? Section C Q3b&c) I do not understand how a bet fit line is taken nor how you know which numbers to use to calculate the gradient Things I realise: Section A Q11) I realised that when a car stops, kinetic energy doesn't just change to potential energy but heat energy is also a part of it to overcome friction. What I learnt: Section C Q2c) I realised that energy does not always just contain kinetic energy or potential energy, but also other types like elastic energy and het energy Paper 2 What I don't understand about my mitakes: Section A Q11) I thought that internal energy increases because of an increase in heat energy causing the molecules to vibrate, therefore increasing in speed and kinetic energy. Why was the answer about potential energy? Section A Q14) I thought black was a good absorber of heat and not an emitter of heat Section A Q15) Why does the temperature of water stop rising? I thought the temperature still rose but jist not as fast as before Things I realise Section A Q20) I realised that kinetic energy is converted to heat energy to overcome friction and not potential energy.. This is the mindmap that I have done for Chapter 6 of Physics which is 'Work, Energy and Power'': 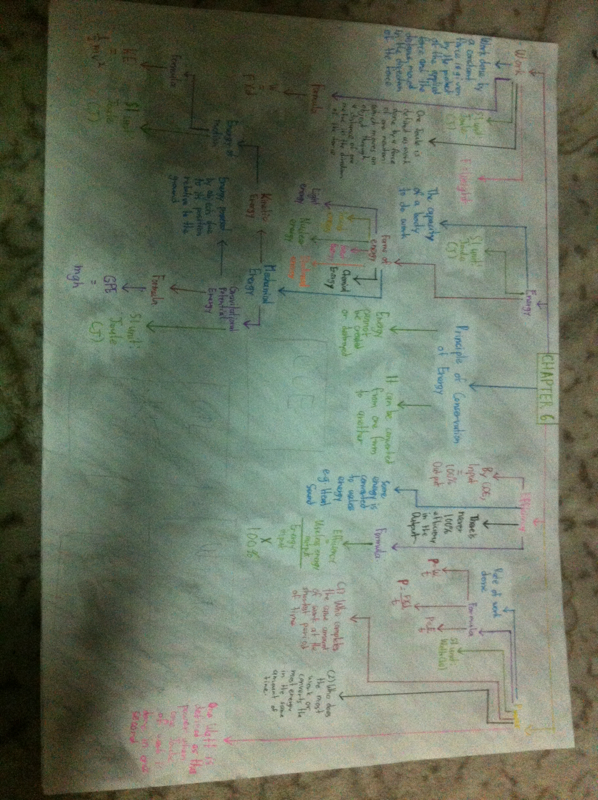 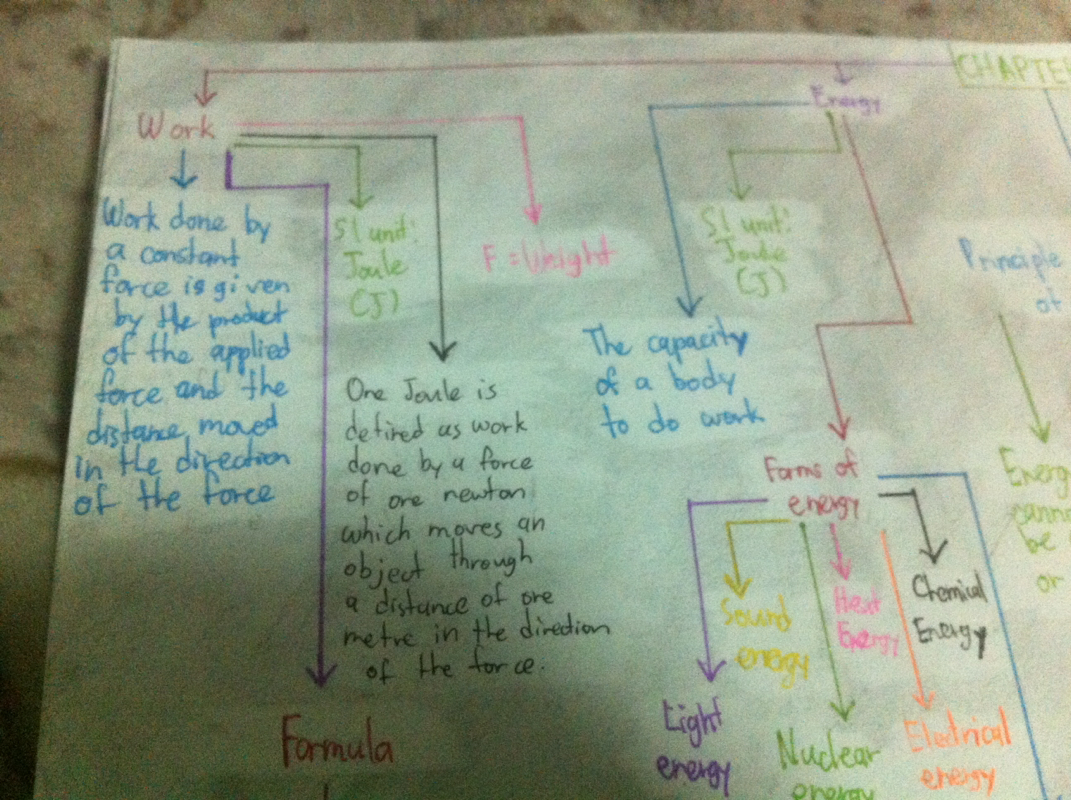 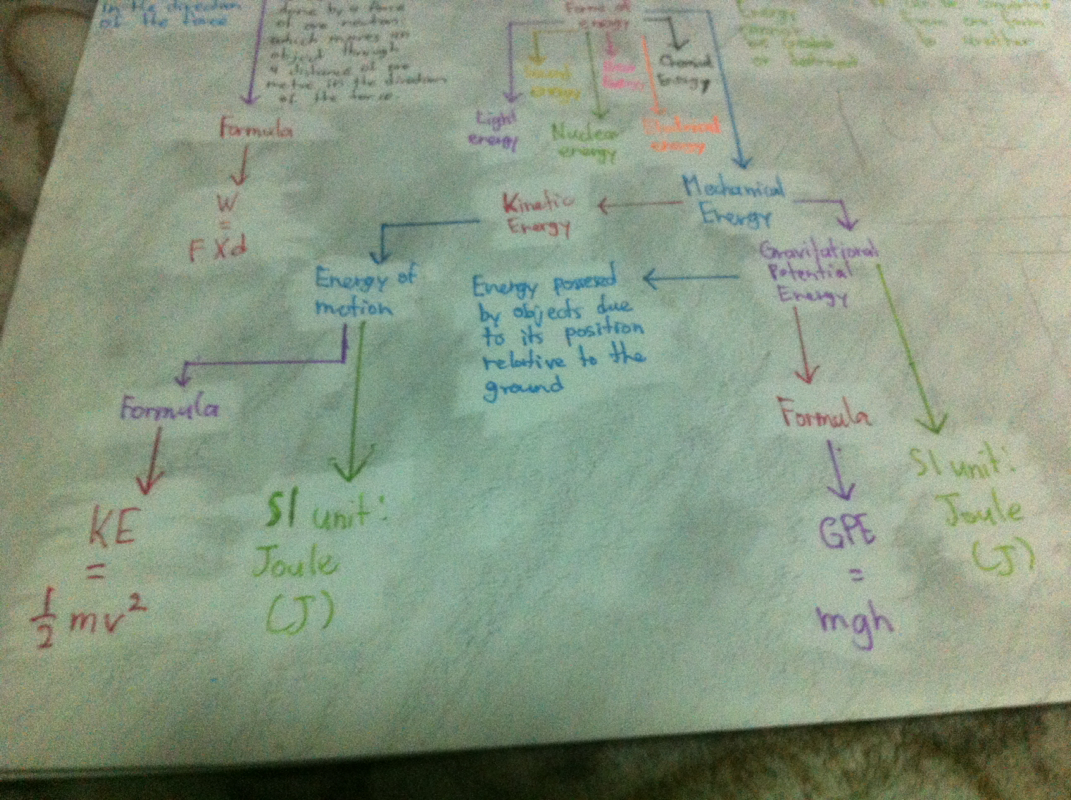 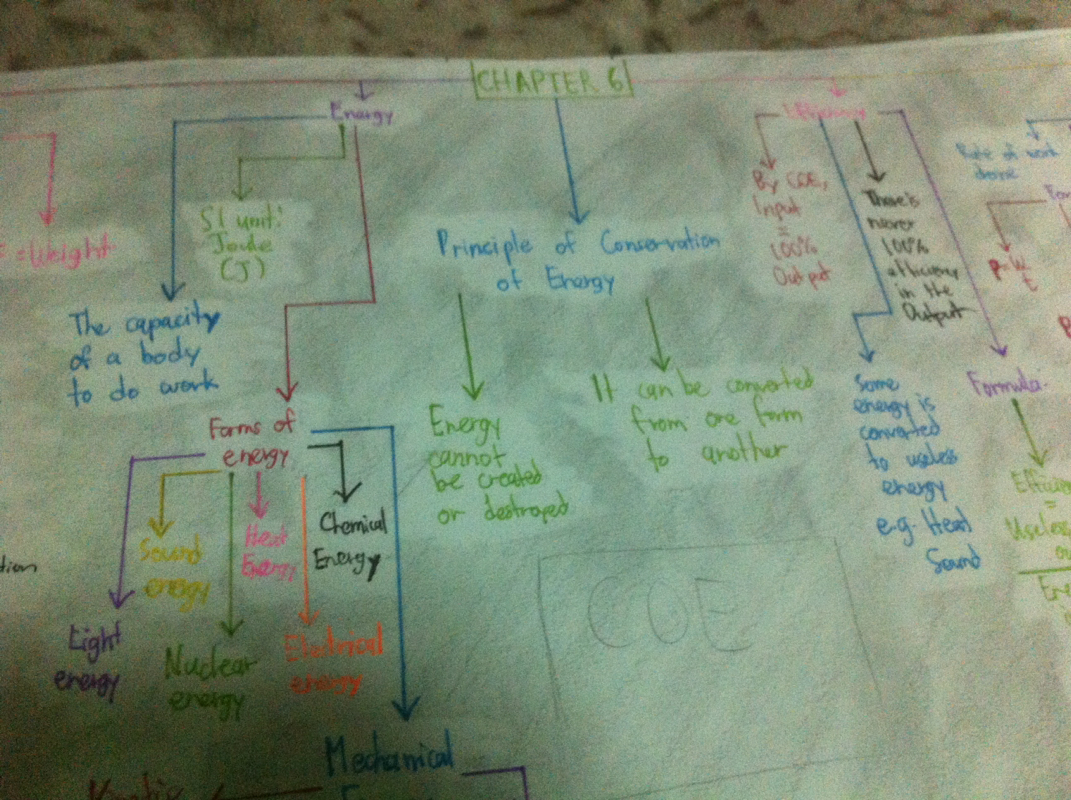 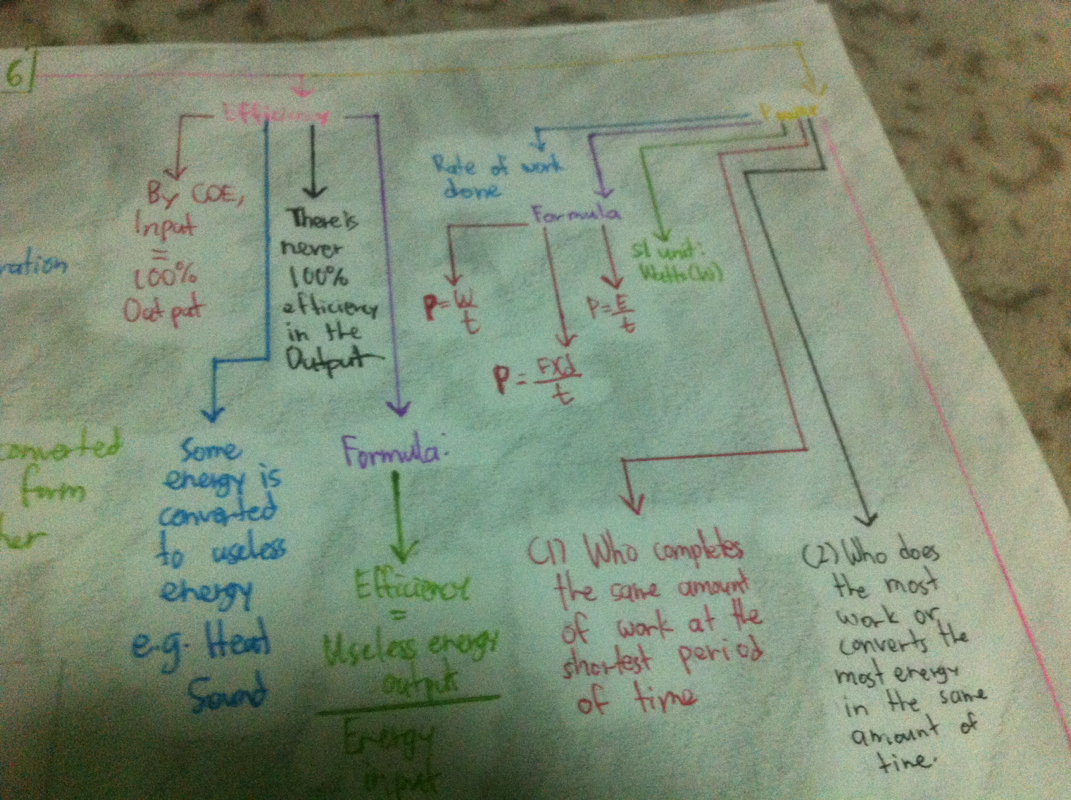  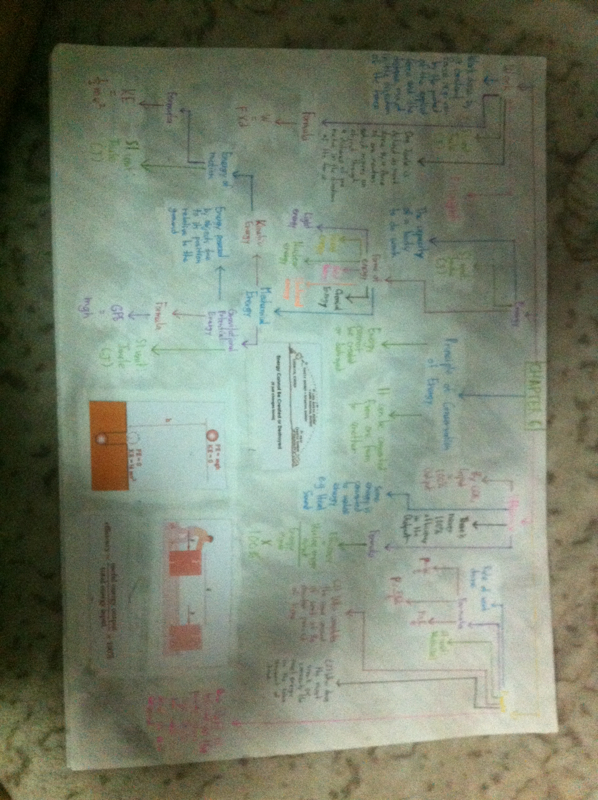 This is the mindmap that I have done for Chapter 4 of Physics which is 'Mass, Weight and Density': 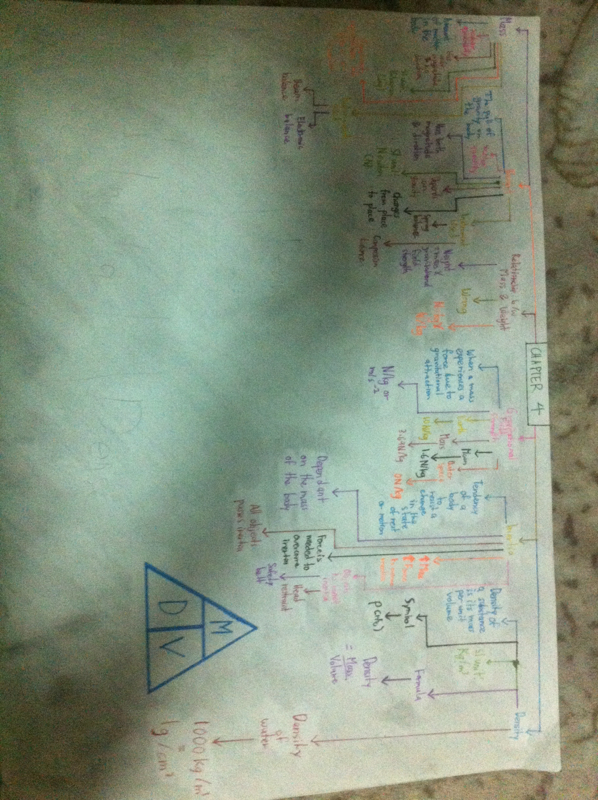 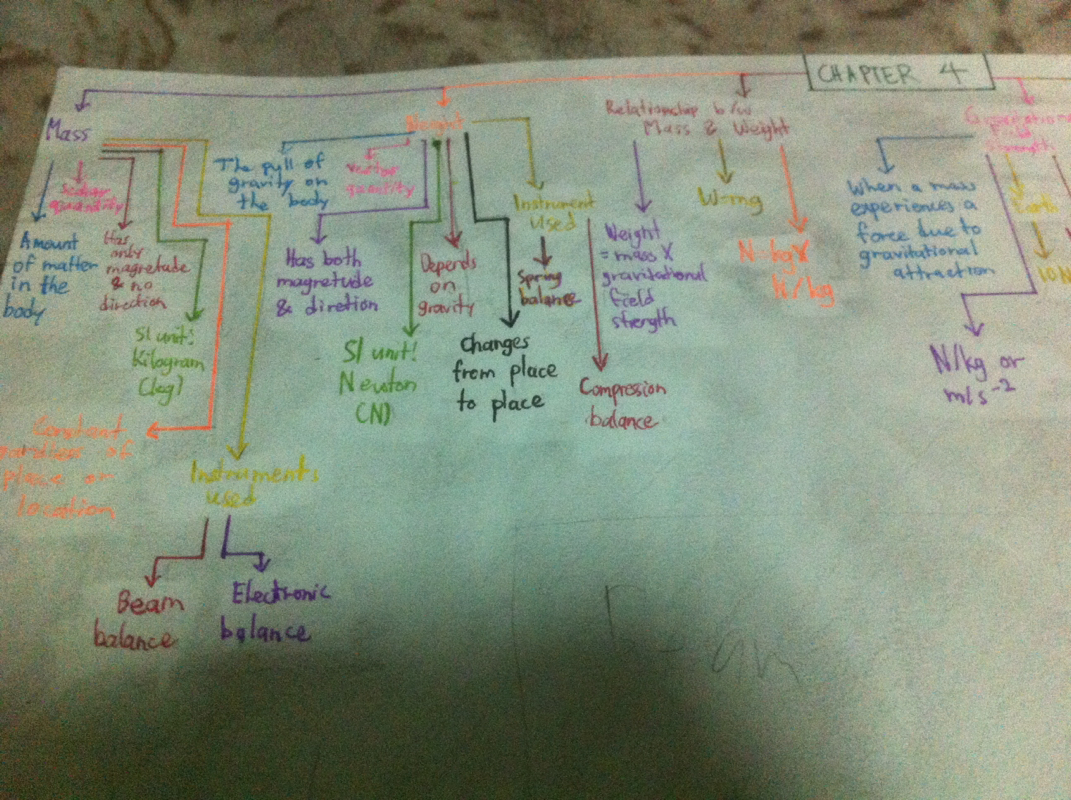 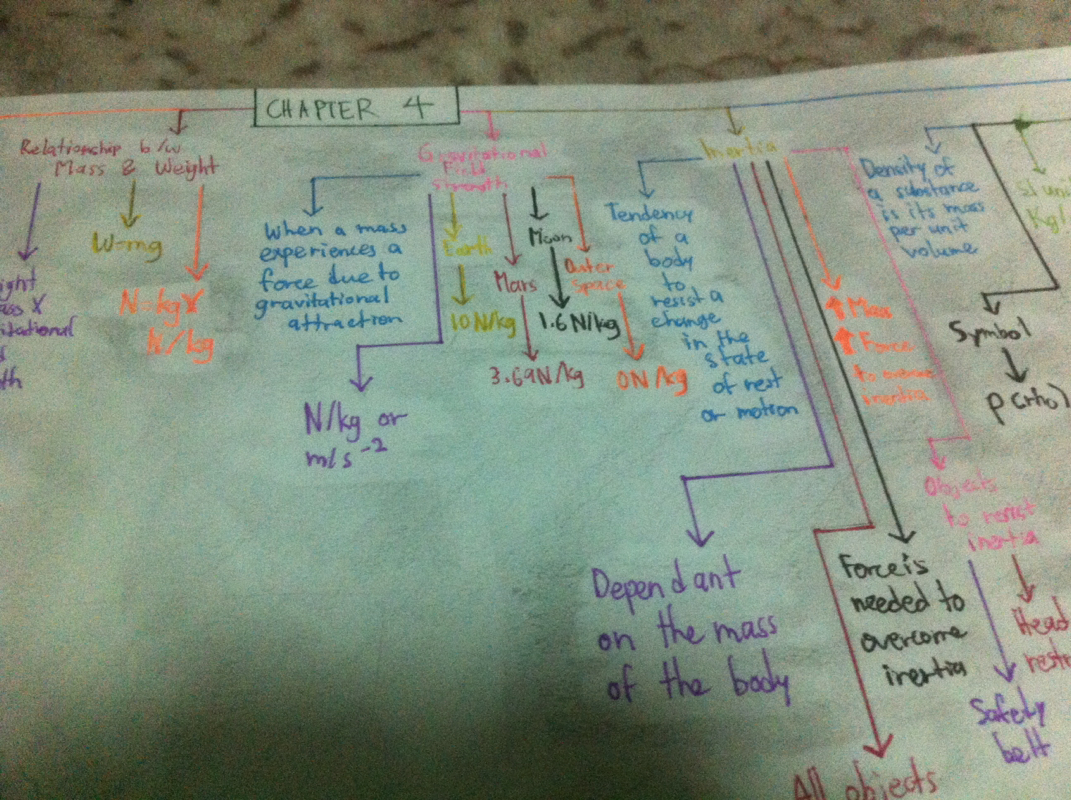 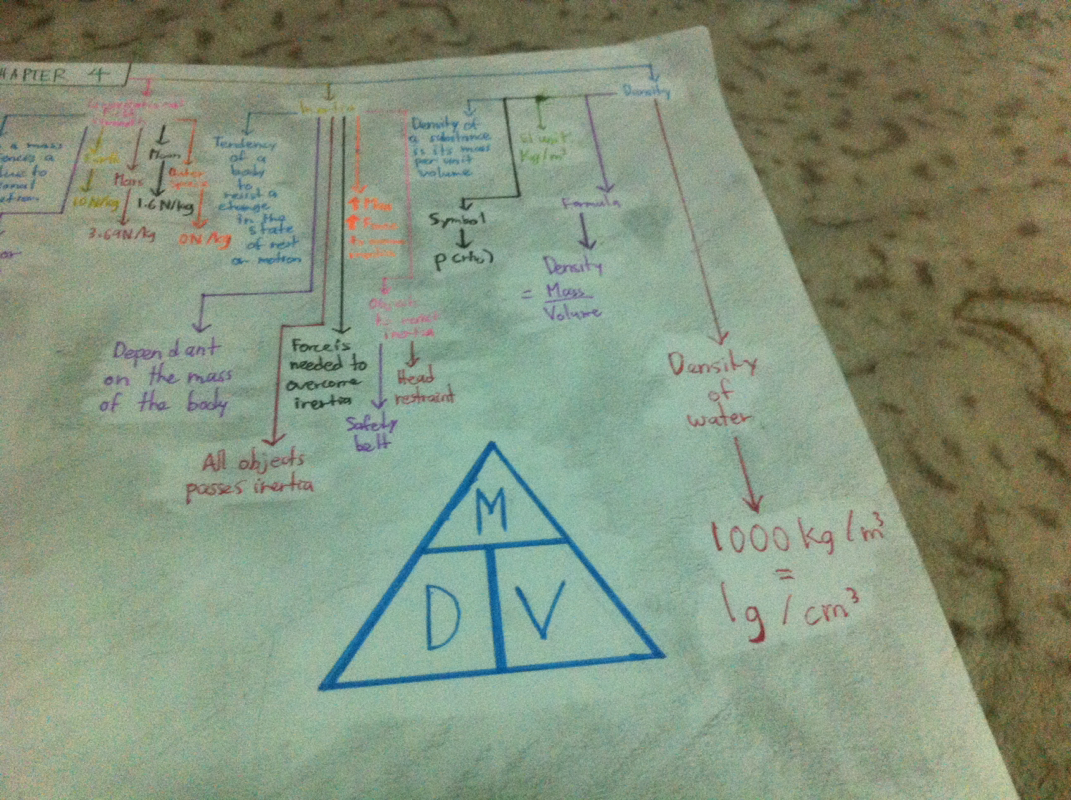 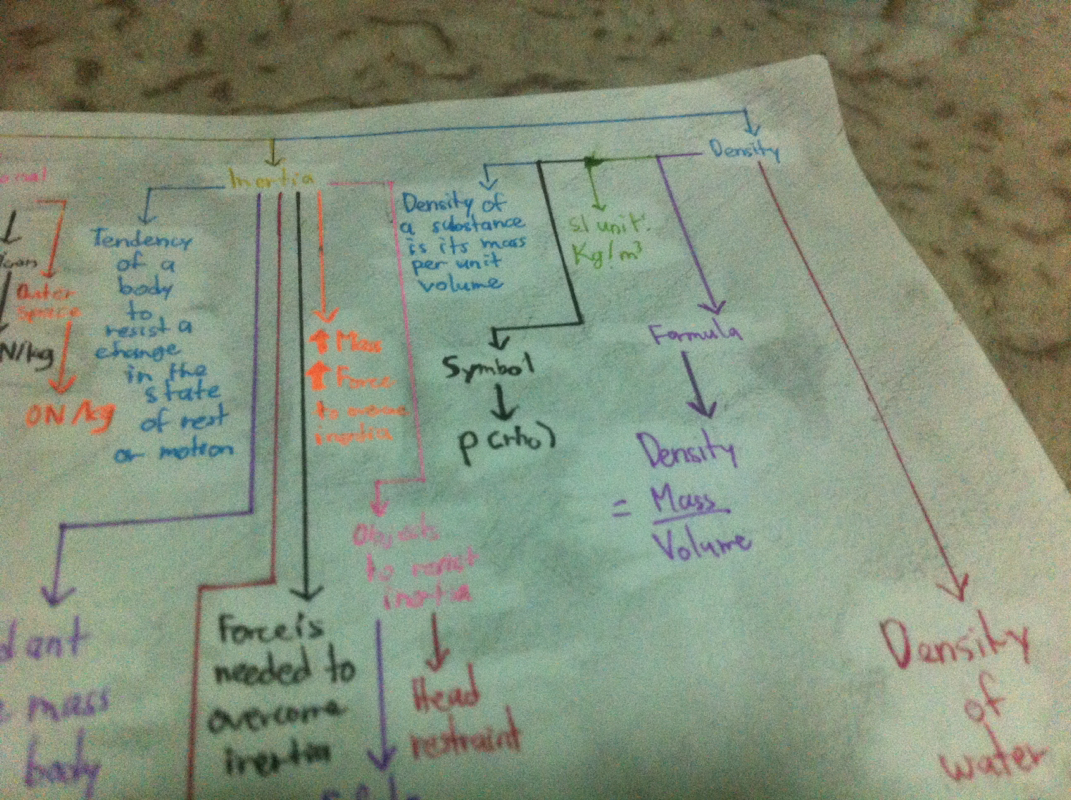 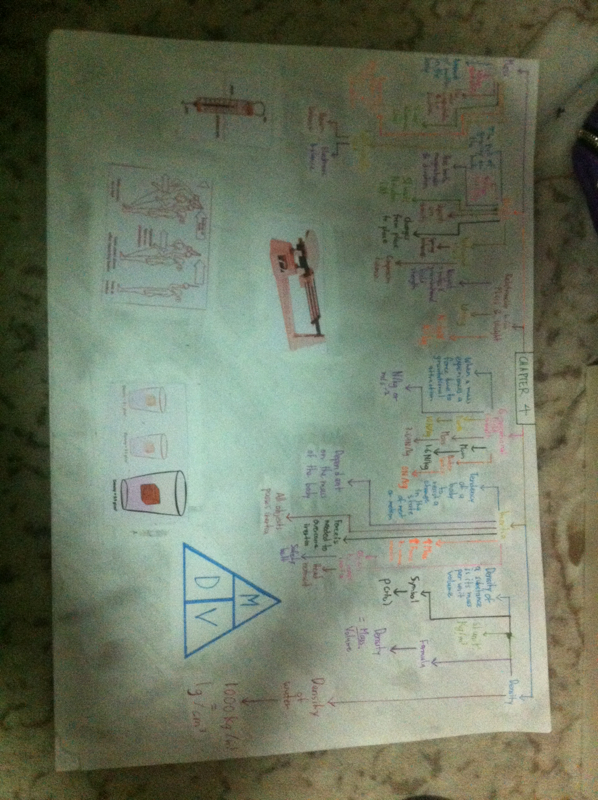 What I have learnt:
I have learnt that when a matter is heated, the reason it expands is because its speed increases and not the increase in size. I can now clearly understand how matter expands in a more detailed way. I learnt that, from the kinetic model of matter, tiny particles that make up matter are always in continuous motion. I understand more fully why gas can be compressed but liquid and solid cannot. Questions I have: 1) Does the rate of collision increase or decrease when the matter is heated? 2) Does gas or solid expand more? 3) Why isn't the answer 'molecules move further apart when heated' accepted but 'molecules move more quickly when heated' is? Why isn't the first answer correct? 4) Are smoke particles considered as gas particles? 5) Are smoke particles faster moving compared to air molecules? Roses are red,
Violets are blue, Newton found out, Why rocks sink like they do Here is an informative video explaining density using various visual examples: I felt that the pictures and animations provided made it easier for me to understand. That is why I thought this video was helpful to me.
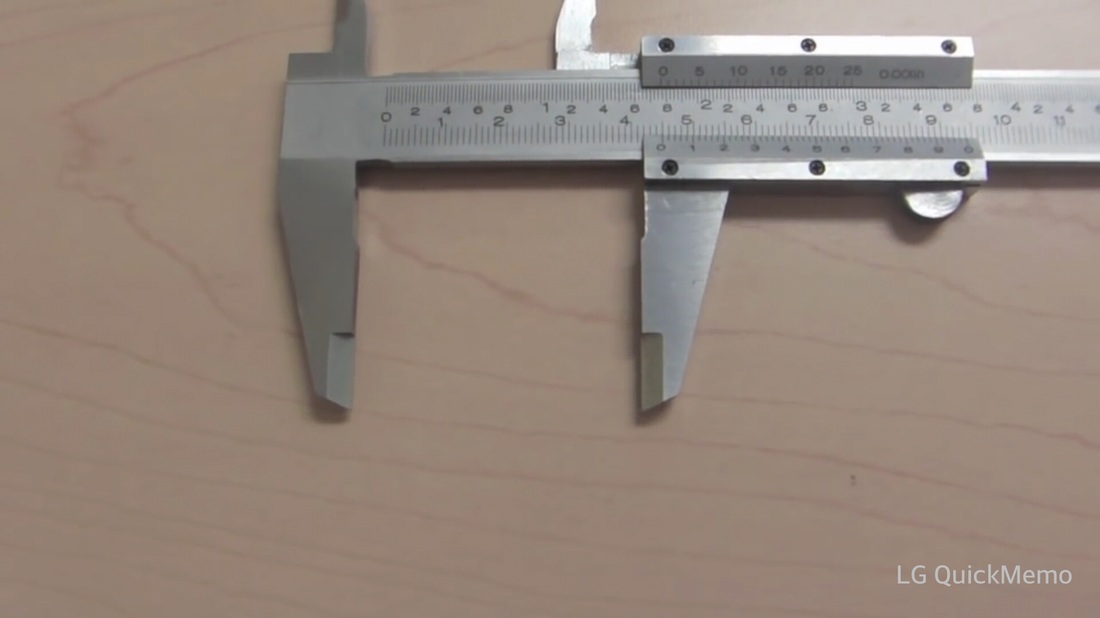
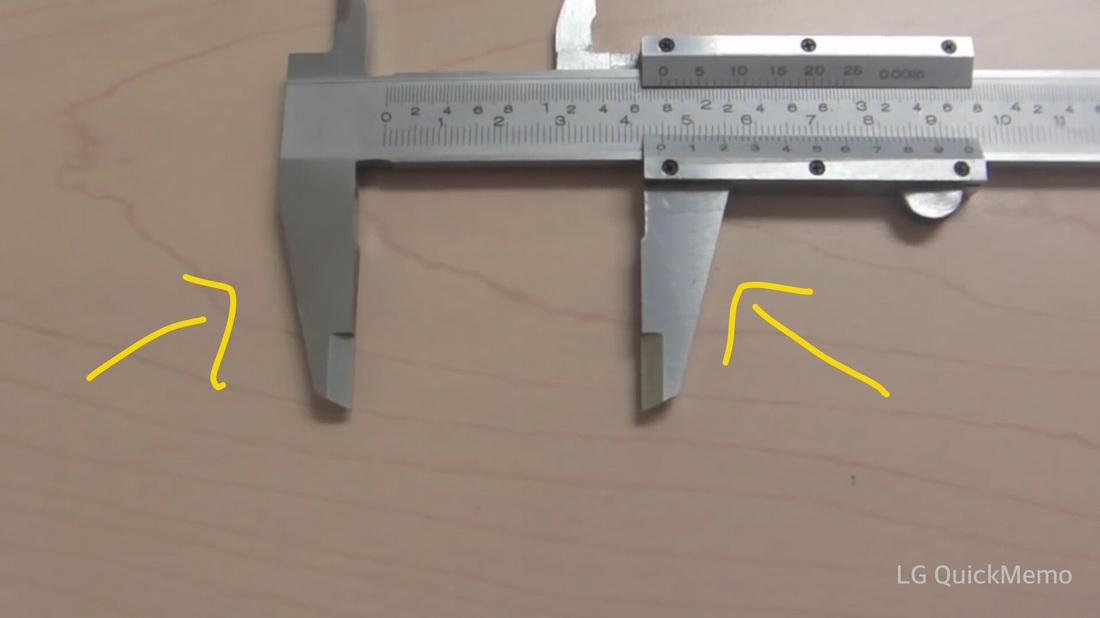
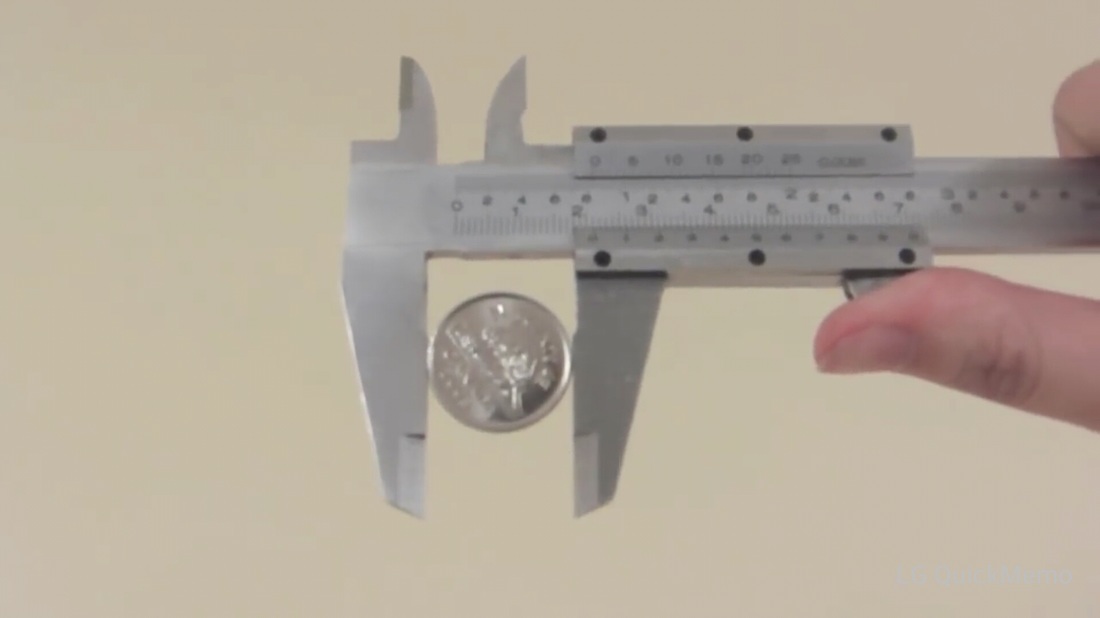
Here is what I have learnt in the video: 1) I have learnt that the density of water is 1 kg/m3. Any item lighter than that will float and any time heavier than that will sink 2) I have learnt that it does not matter if the weight of the item is heavy or light. Its buoyancy depends on the density of the item 3) The atoms play an important part in density 4) The term buoyant is used to express floating or staying afloat 5) If an item is cut in half, its density still remain the same because of the tightness of the atoms in the item even if it was cut in half Here I made a mindmap about what we have learnt so far in Chapter 1 of our Physics lesson. The topic covered in Chapter 1 is "Physical Quantities, Units and Measurement". This is the mindmap I have done: 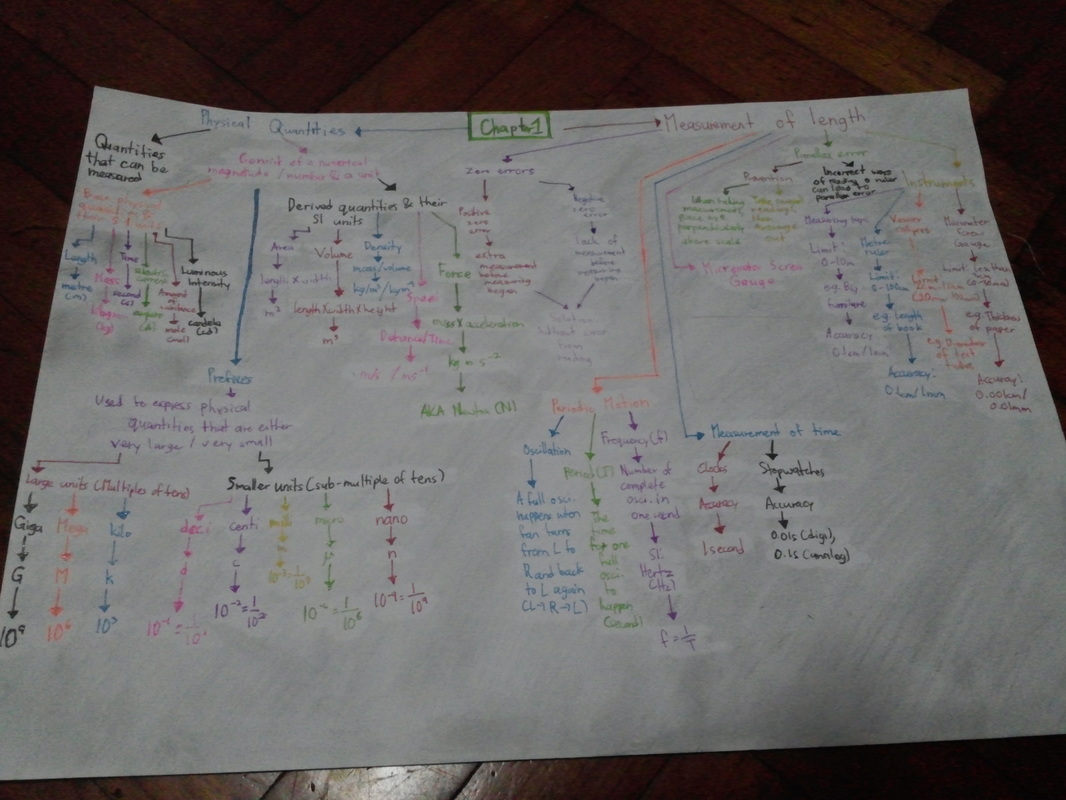 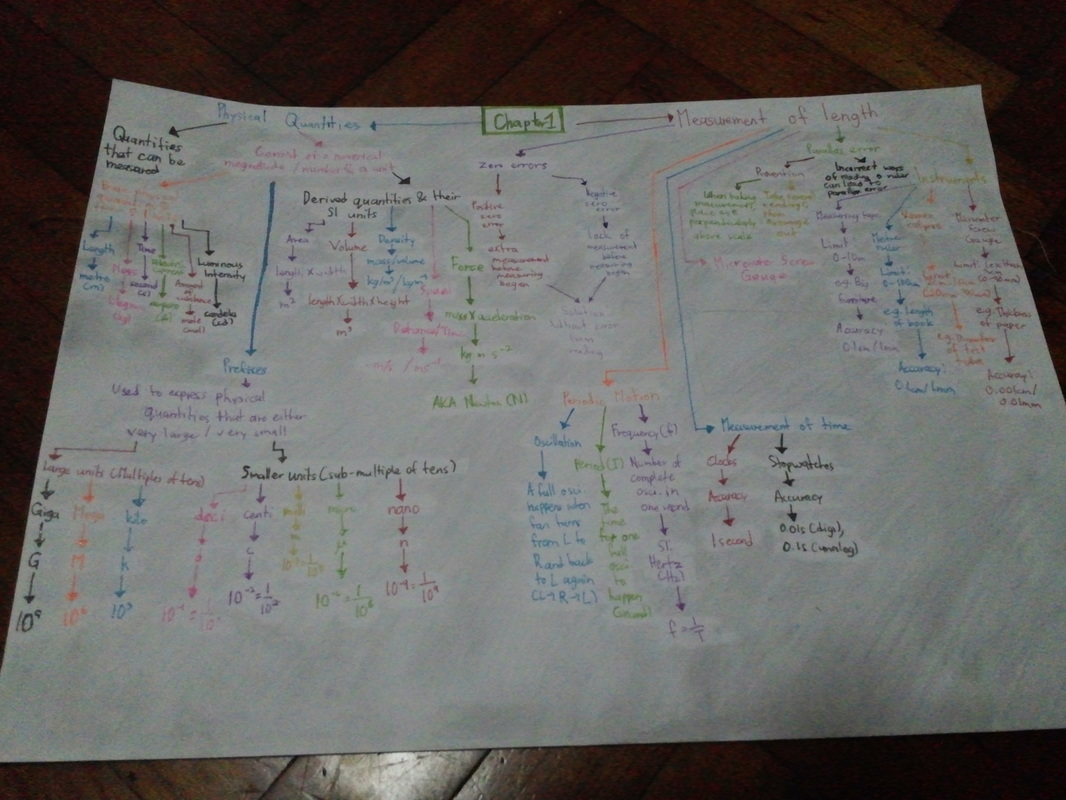 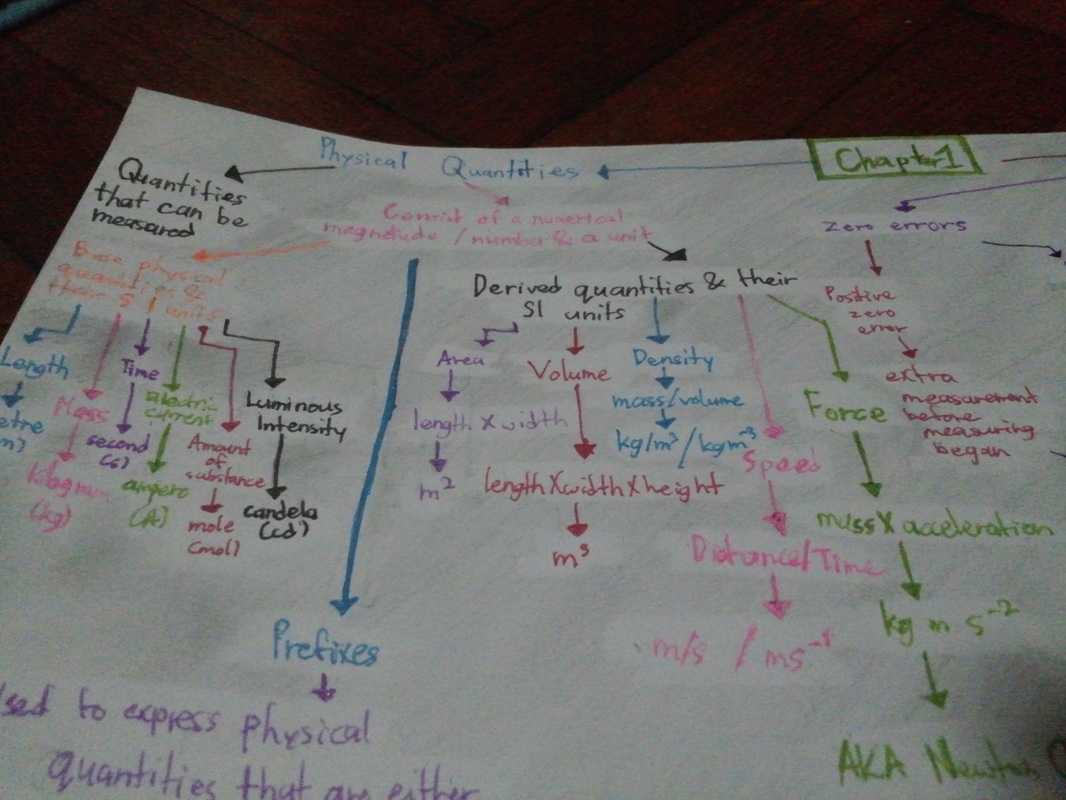 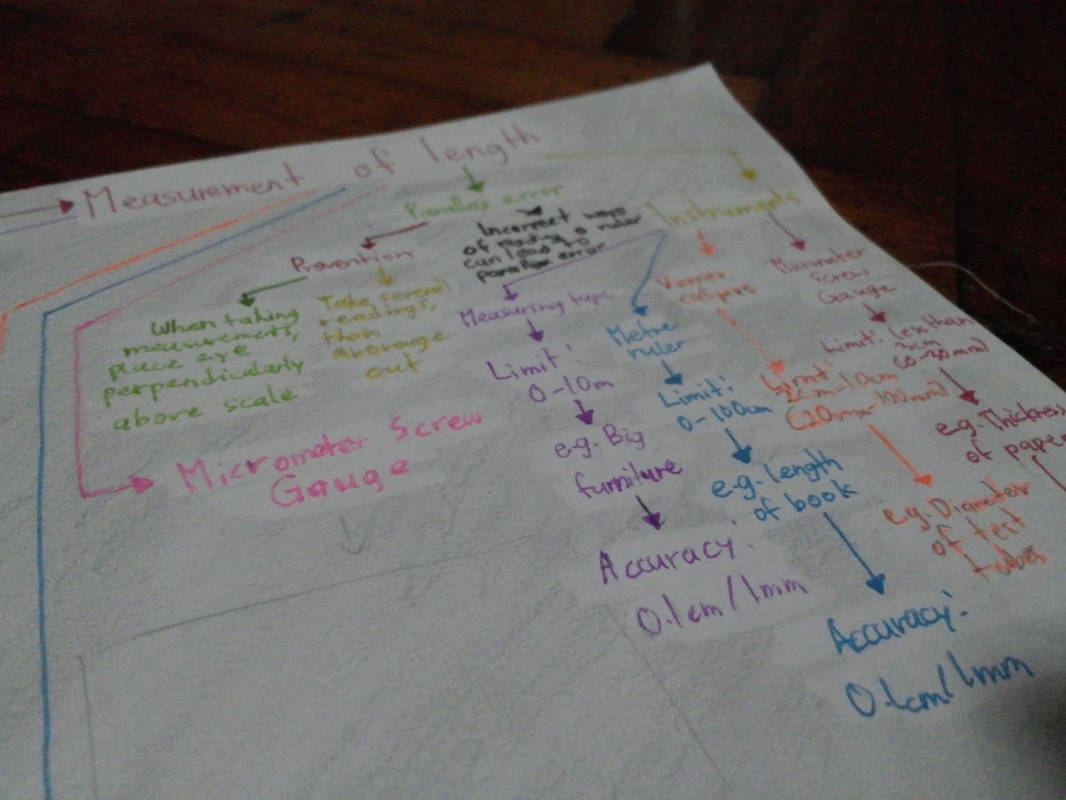 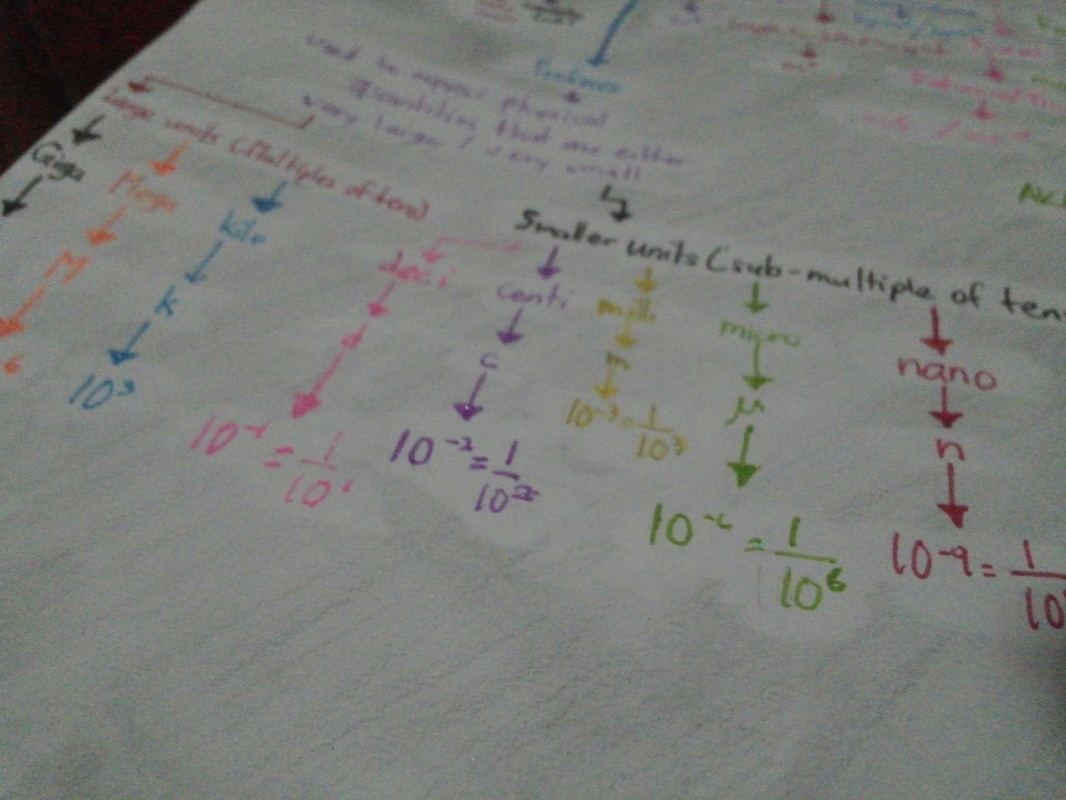 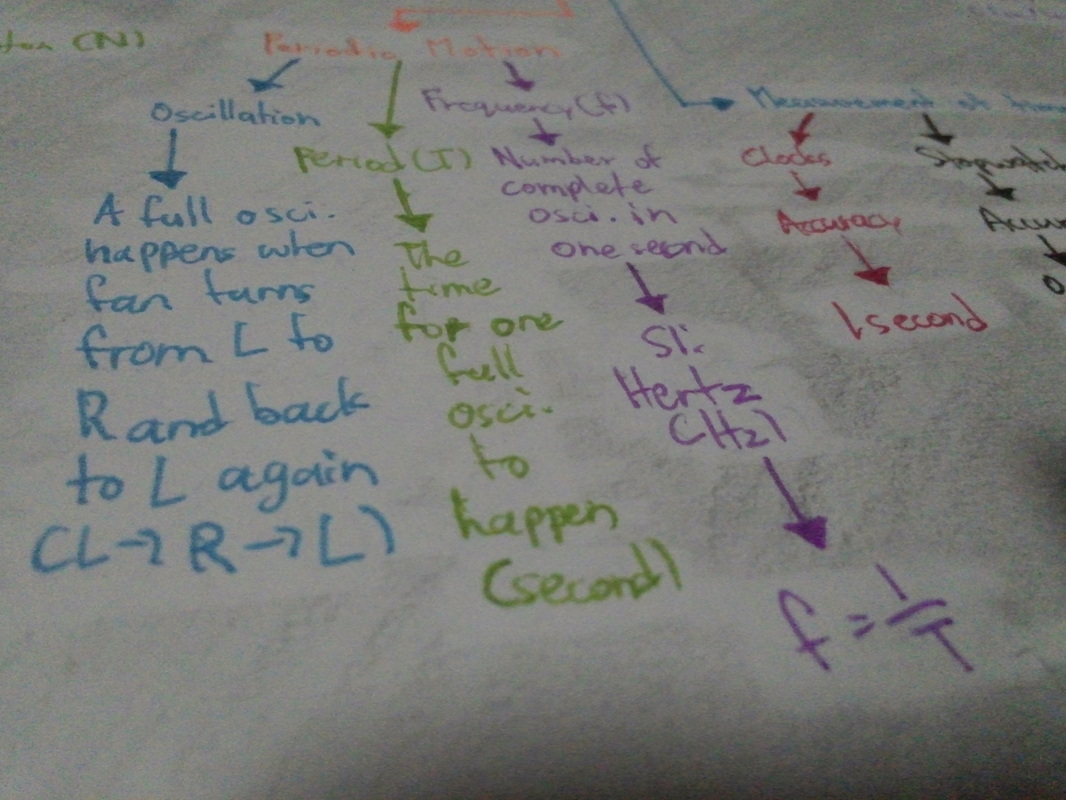 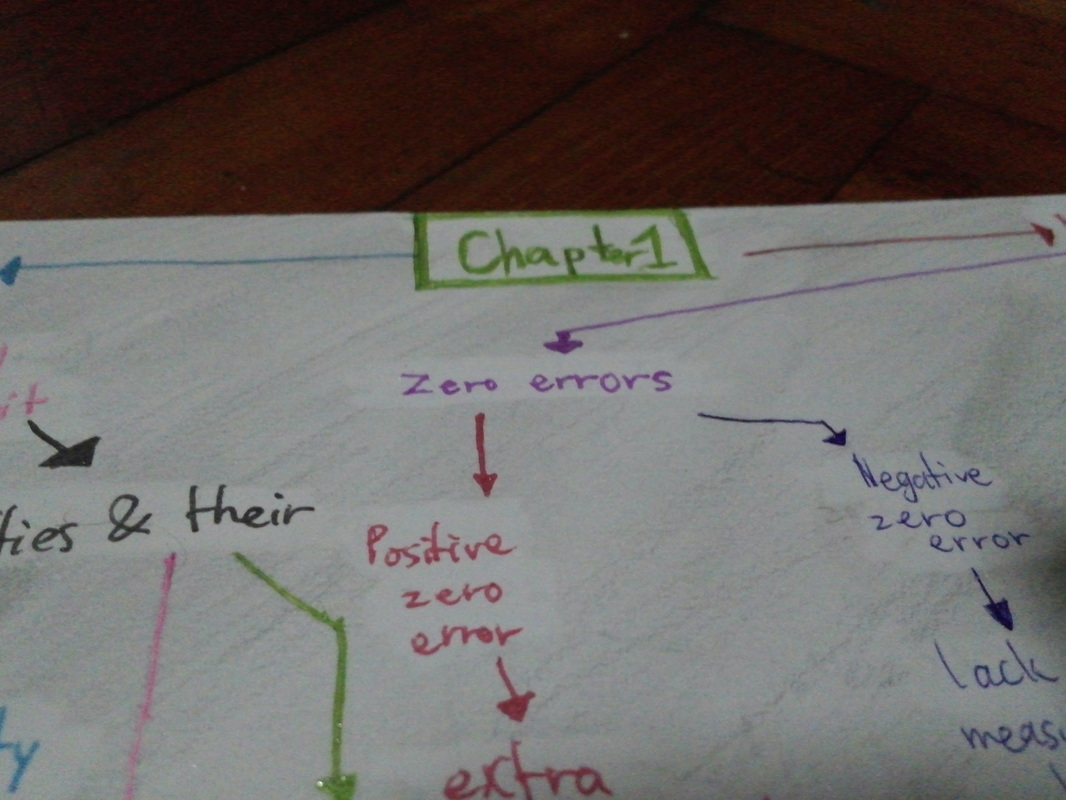  The pictures on top was when it did not have pictures yet. It however shows the design that I have put into the mindmap. I decided to write my information using multi-coloured pens to make it more attractive. For the background, I simply used a pencil and shaded the whole paper lightly. Then, I used my finger to smudge the shades of pencil to make it look better. I figured that the words sometimes do not contrast with the background colour of grey. What I did to solve it is that I used my eraser to erase the smudges off of the background of the words to make it pop. This leaves a white empty space so that the words are seen more clearly with a whiter background. This is the final mindmap that I already had put the pictures in: 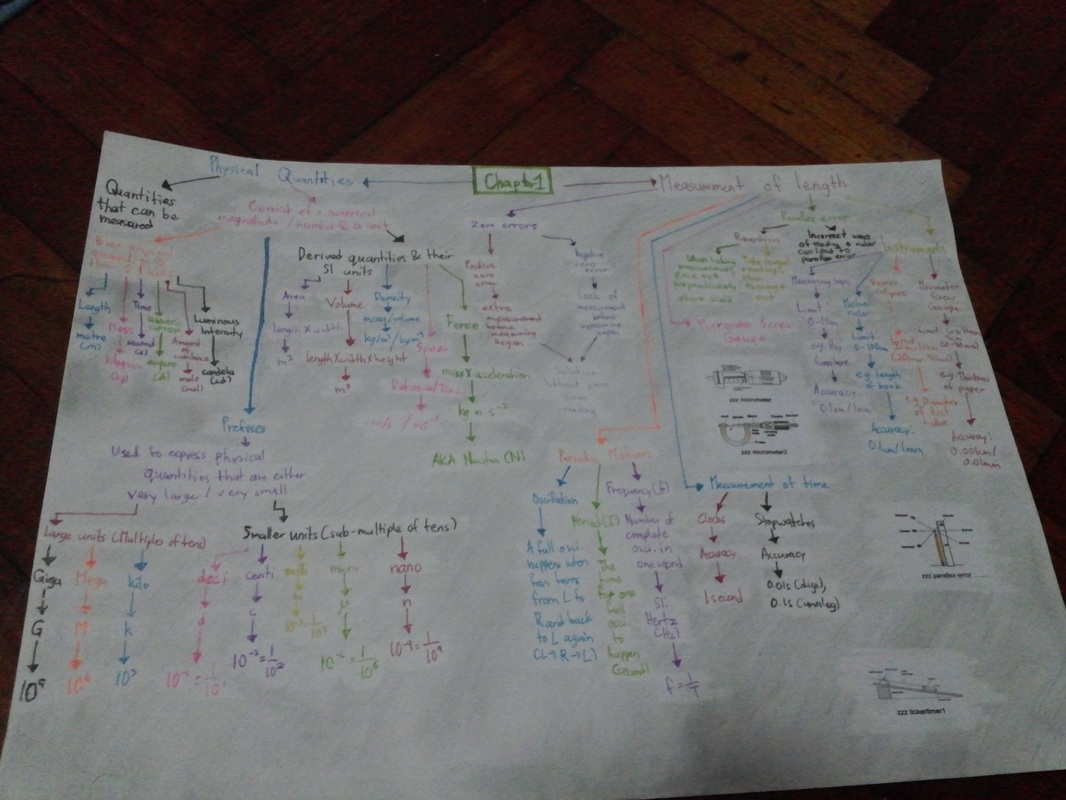 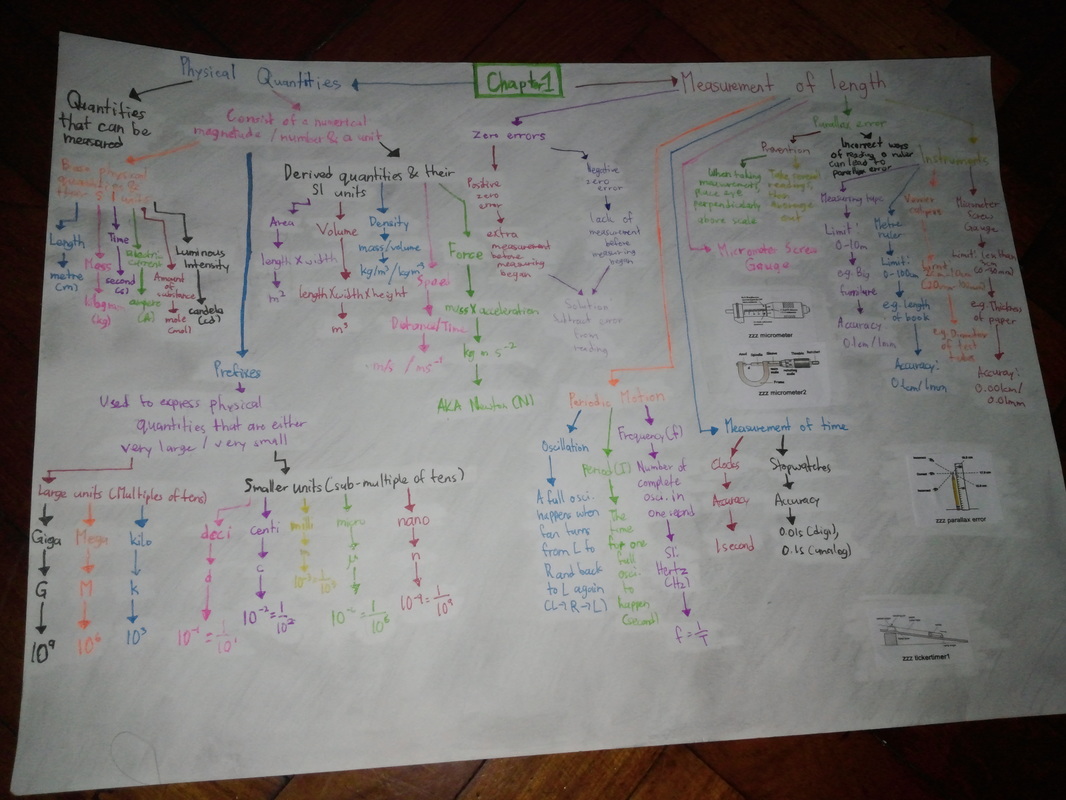 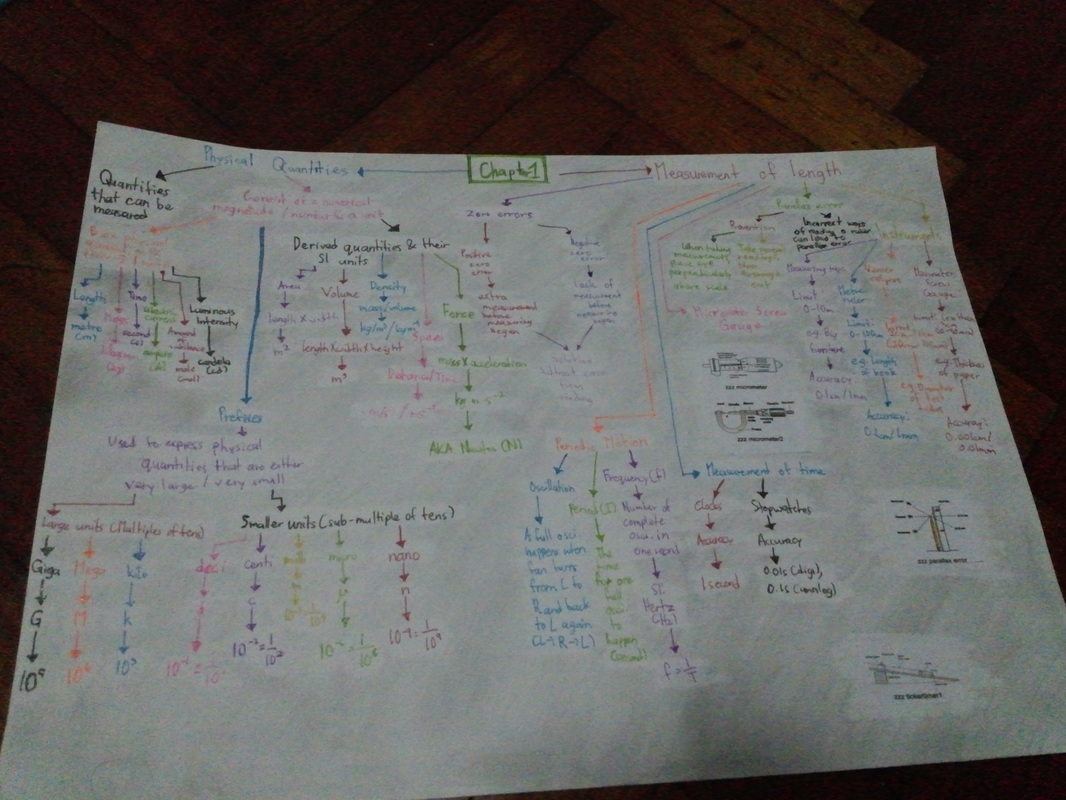 I have watched a few YouTube tutorials on how to use a vernier caliper but had some difficulties understanding some because the problem was each video had a little difference in the setting of the vernier caliper each time. There were a lot of different models that the tutorials used. Some tutorials used inches to calculate the length of the object while some used centimeters. Some had different measurements and scales on the vernier caliper and there had different ways of calculating the length of the object. 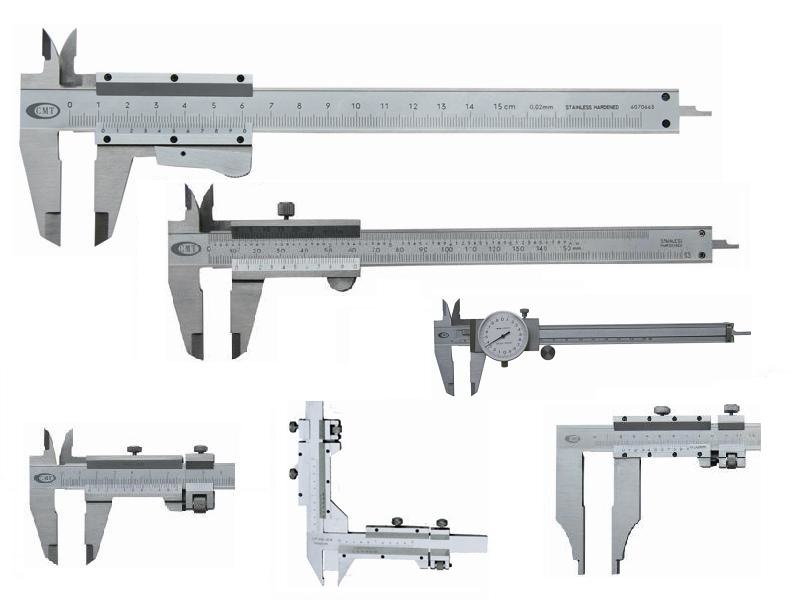 But after watching a few more videos about vernier calipers, I finally found a video that helped me understand how it basically works and the measurements and scales are in metric which makes it easier to understand. Link here From what I have seen from the video, these are the steps on using a vernier caliper: Step 1: Pick an item you want to measure and make sure that it does not exceed the maximum length that the vernier caliper requires. In this case, the vernier caliper's maximum length is 6 inches or about 15 cm as seen in the picture below:  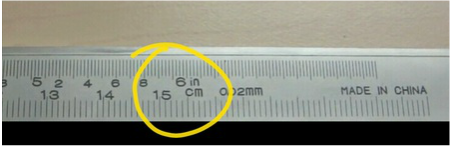 Step 2: Open the main calipers (which are those calipers I pointed at in the picture below). Put the object in the middle and close it tightly. If there is any lock option on the vernier caliper, it would help to tighten and secure the length in place. Step 3: Now look closely at the vernier scale and the main scale. (The vernier scale is the slightly smaller scale that the arrow is pointing at below) The 0 point of the vernier scale should point at another measurement on the main scale. 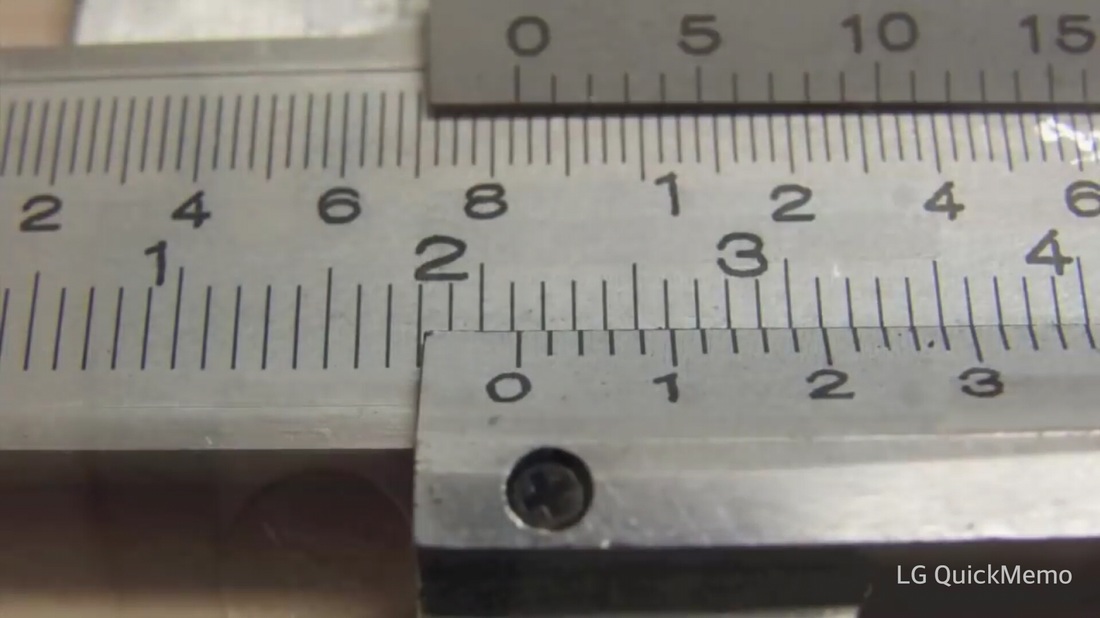 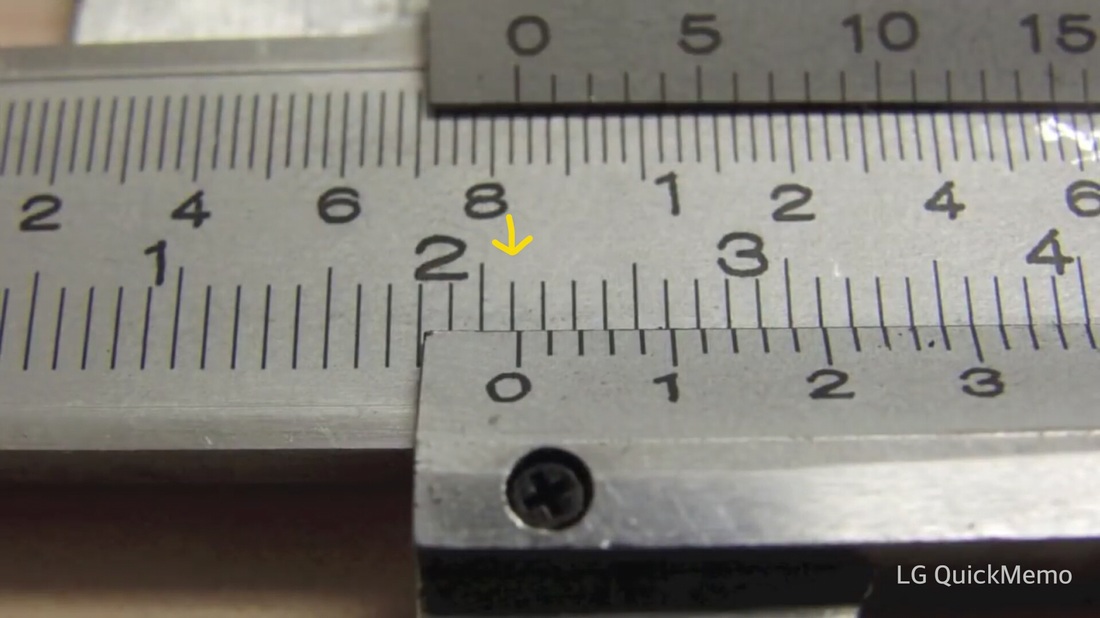  In this case, we can see that the 0 point in the vernier scale is pointing at the 2.1 cm mark on the main scale. Now note down the 2.1 cm mark because it is not accurate enough yet. Step 4: Now the more complicated part. Look closely at the vernier scale and the main scale again. This time, search for the mark that lines up together perfectly in the main and vernier scale. 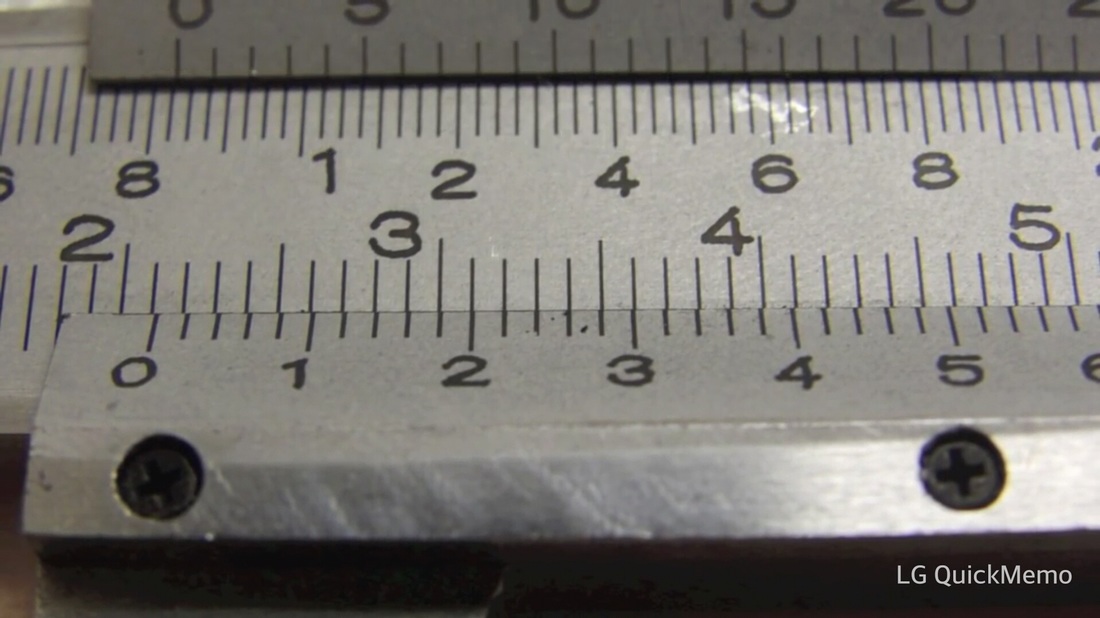  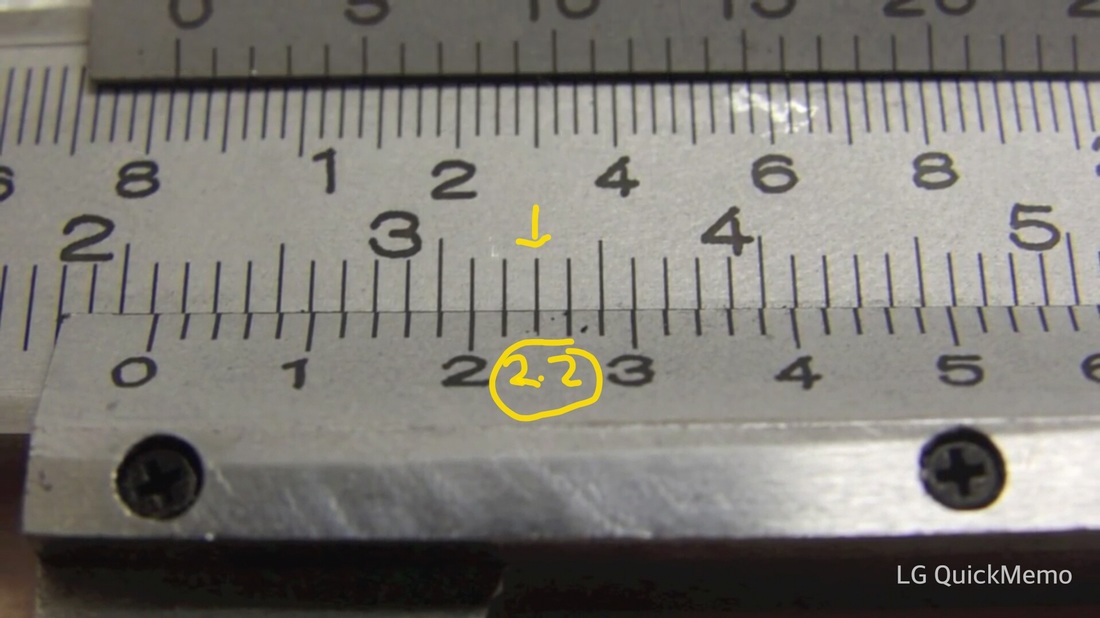 The image above shows that the marking is at the 2.2 mark on the vernier scale. That is also another important measurement to note down because it still needs to be calculated to make one whole length. Step 5: Now that you have gathered all the measurements needed on the vernier caliper, it is now time to calculate the real measurement or length of the object. Firstly, you need to take the previous measurement made on the vernier scale earlier and divide it by the maximum scale measurement on the vernier scale. In this case, it is 10  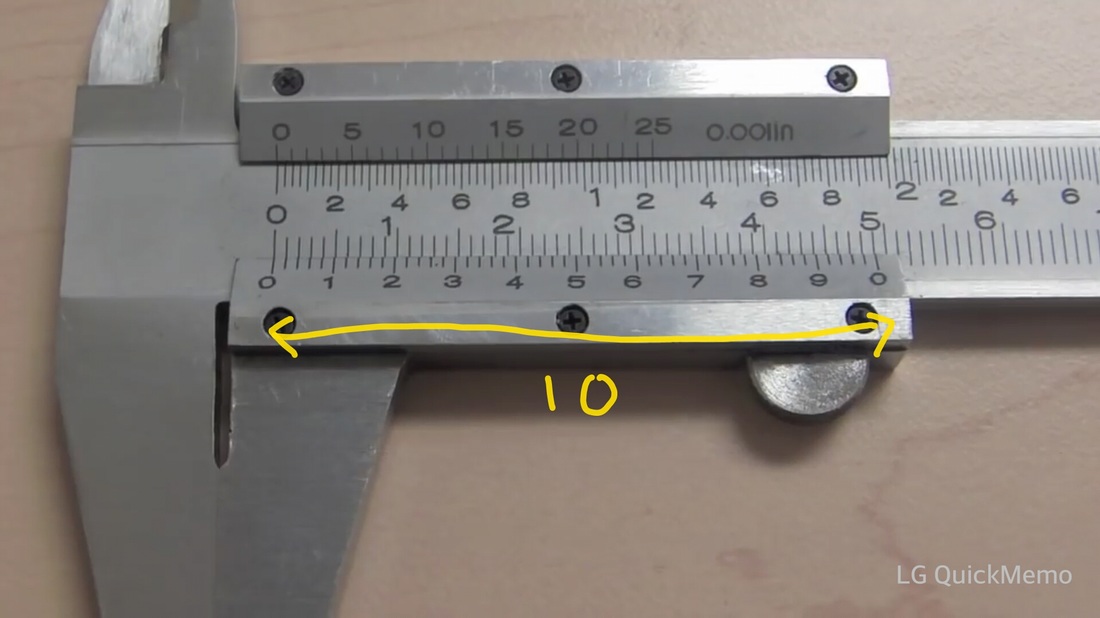 Next, you have to take that answer and multiply it with the smallest division of the main scale. Which in this case, is 0.1 cm 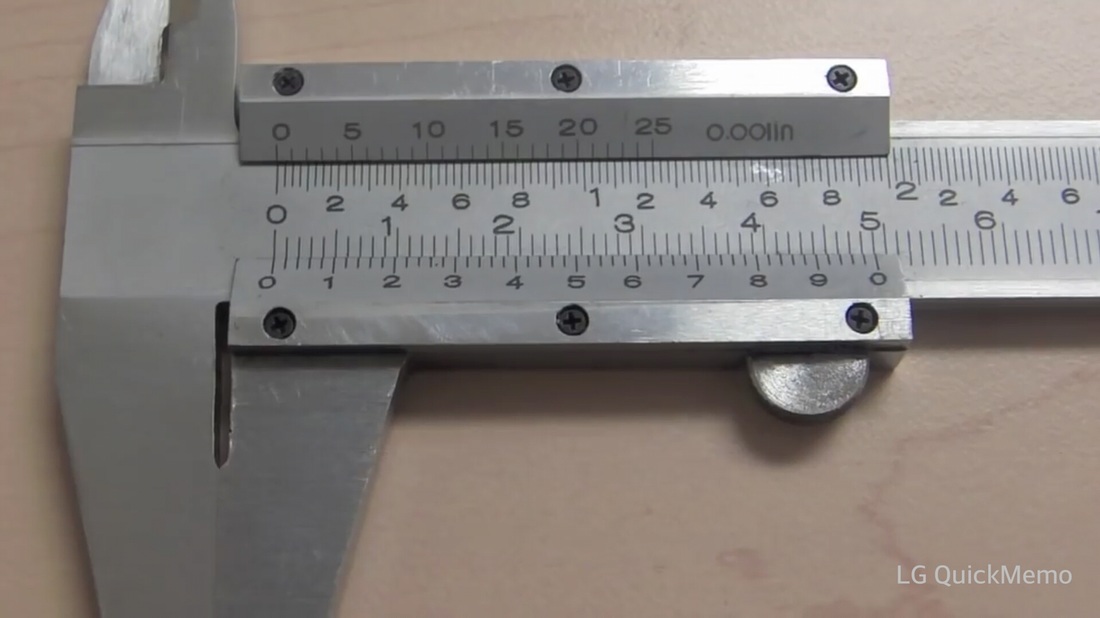 Now put it all together and you should get this answer: 0.022 cm 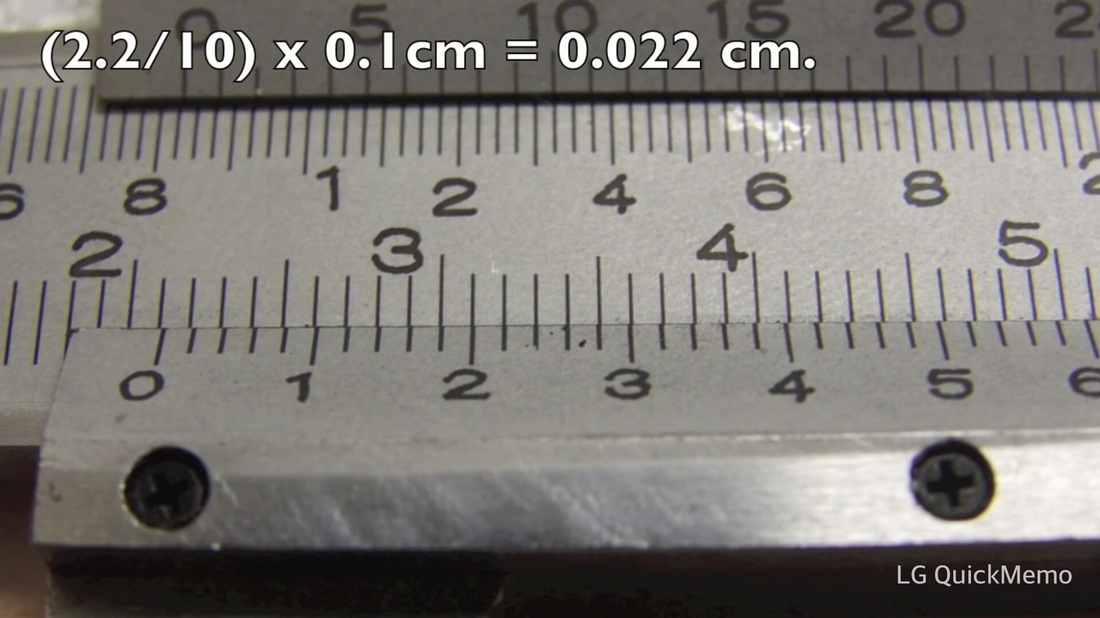 Step 6: Now all you have to do is add those numbers with the measurement you have gotten previously from the main calipers in Step 3: 2.1 cm 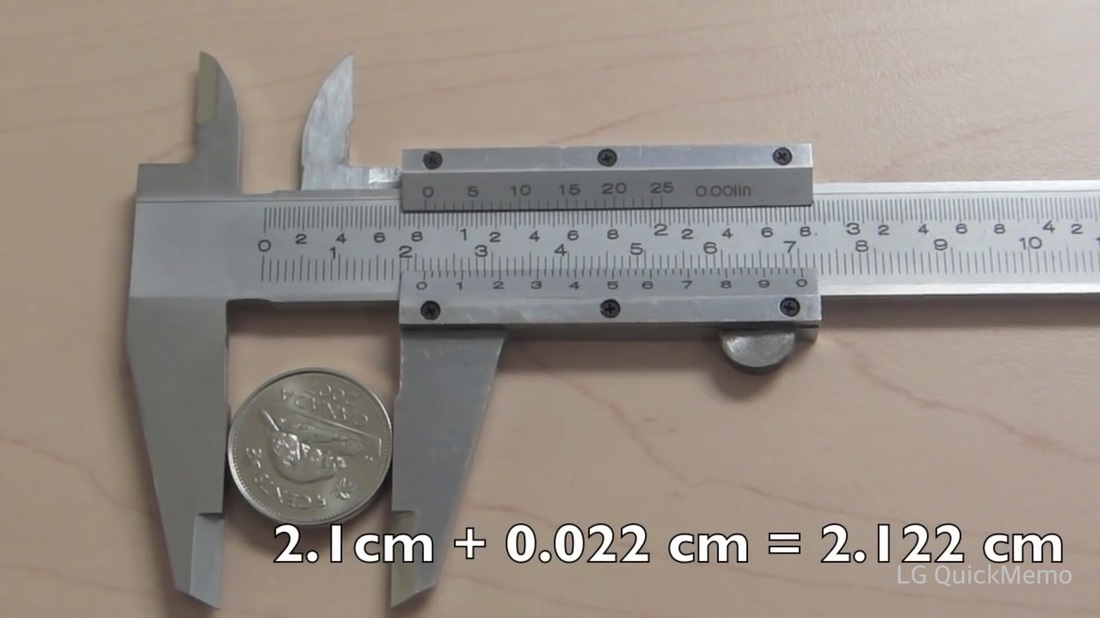 Your answer should be 2.122 cm 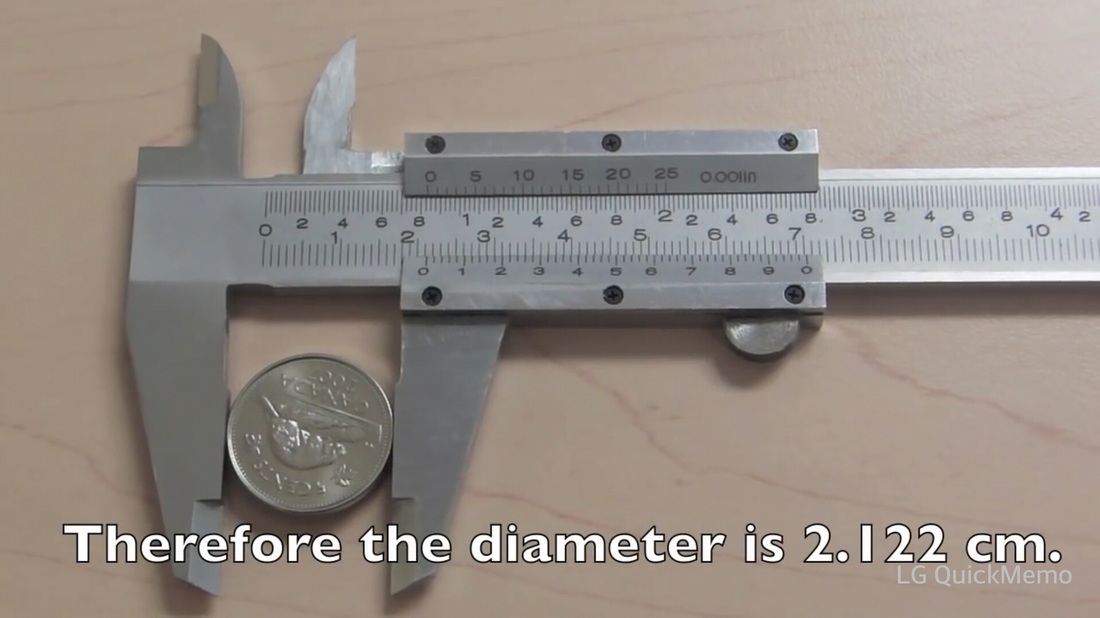 That's it! It may look complicated but it is easy to get the hang of it.
|

 RSS Feed
